In this tutorial, you will install a free SSL certificate for your WordPress installation.
If you have followed along with our deployment from start to setup WordPress on Google cloud. this is the final step.
We have installed Google Click to Deploy a version of WordPress on Google Cloud. If you have installed another version of WordPress image in Google Cloud then, this tutorial will not work.
Before we start on this tutorial you should have,
- Installed WordPress on Google Cloud
- Assign Static IP address to your Google Cloud Compute Engine instance. (Important)
- Set up a Domain Name for your WordPress website
So let’s get started.
Let’s go ahead and install the Free SSL certificate.
This tutorial has 6 Step
- Connect to WordPress via SSH
- Get Certificate Instructions
- Install Certbot
- Generate SSL Certificates
- Restart Apache Server
- Update WordPress URLs
1. Connect to WordPress via SSH
Go to your Google Cloud Console and Click on Compute Engine and select VM instances from left navigation.
Now, in the next screen, you will see your WordPress VM,
Click the SSH button to connect to your WordPress VM instance.
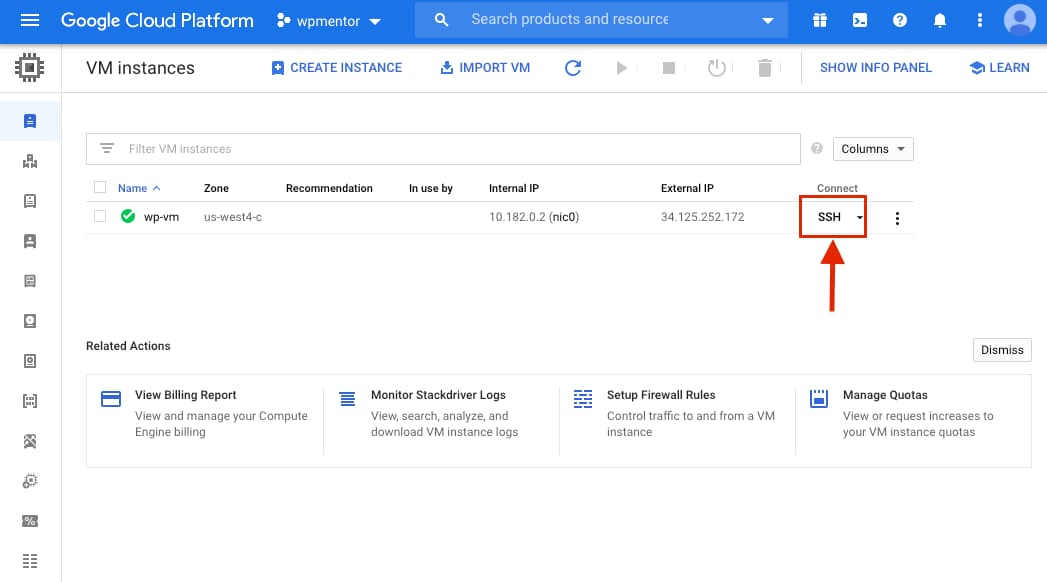
After clicking on SSH, the new window with the SSH terminal will open.
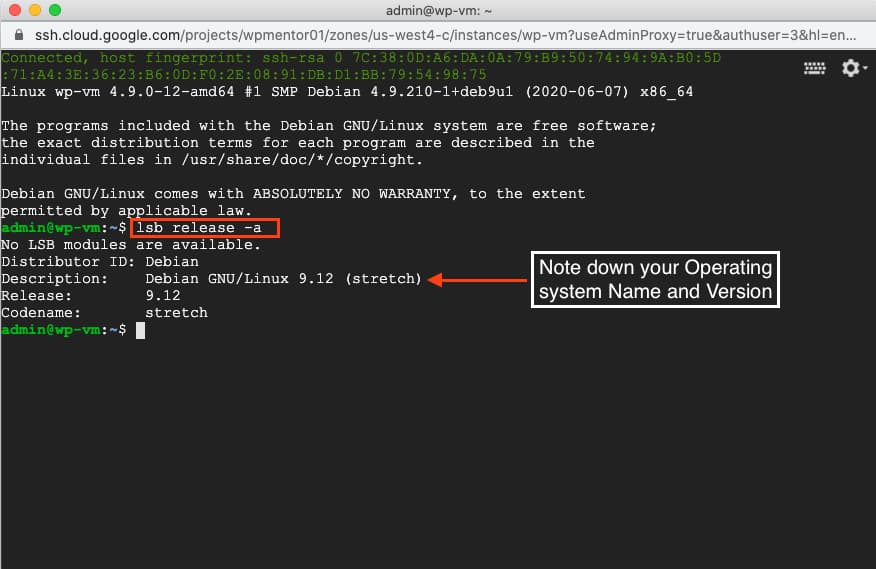
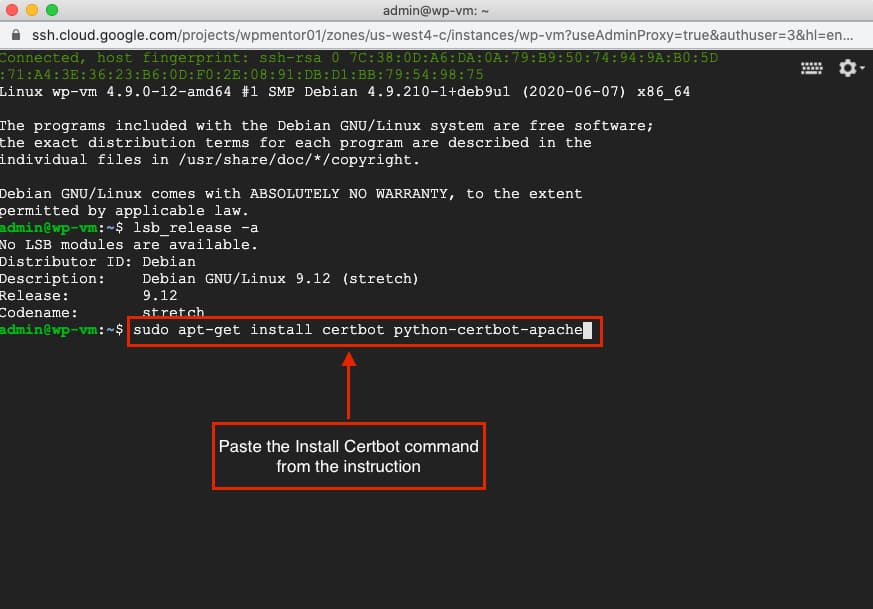
Type the lsb_release -a to get the operations system version.
lsb_release -aFor the Google Click to Deploy WordPress the Operating system is Debian(stretch). please remember the version so you need to get the instruction for this version.
2. Get Certificate Instructions
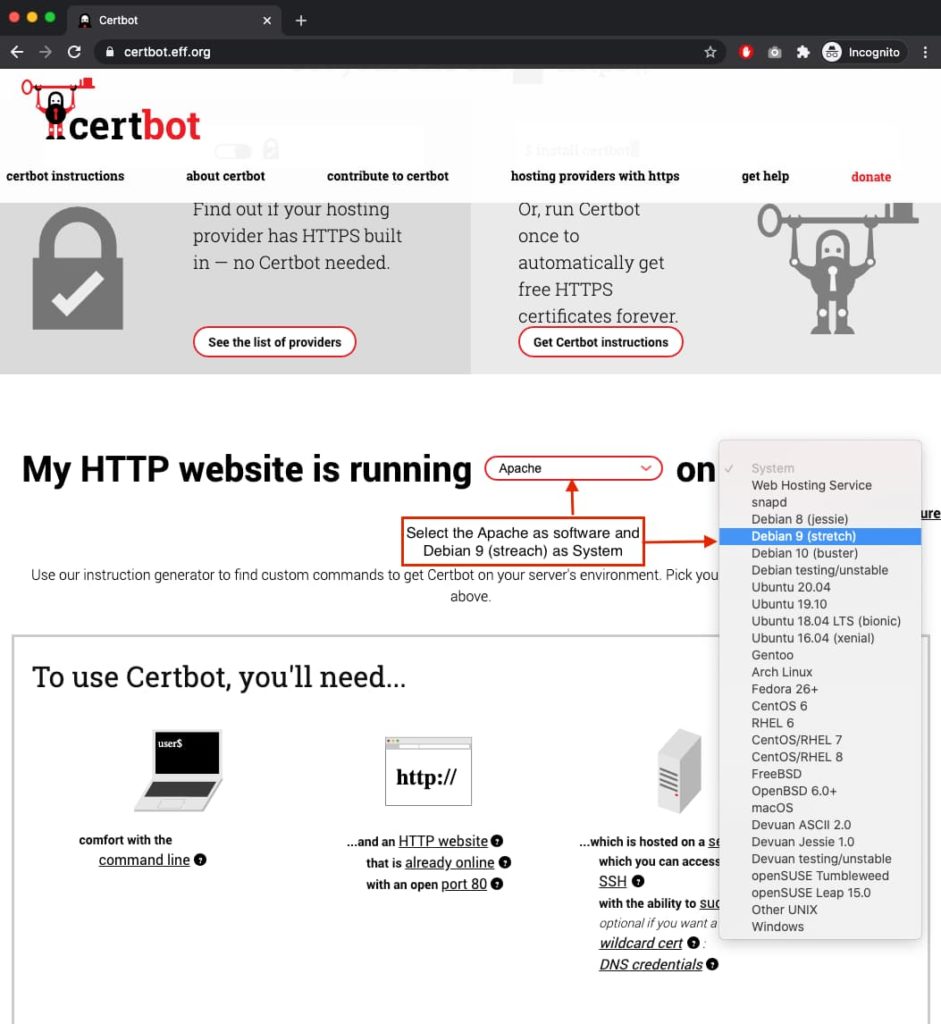
After you have determined your operating system version go to https://certbot.eff.org and select your Software as Apache and System as Debian 9 (stretch) to get SSL certificate installation instruction.
3. Install Certbot
Now As Per the instruction first step is to Install Certbot.
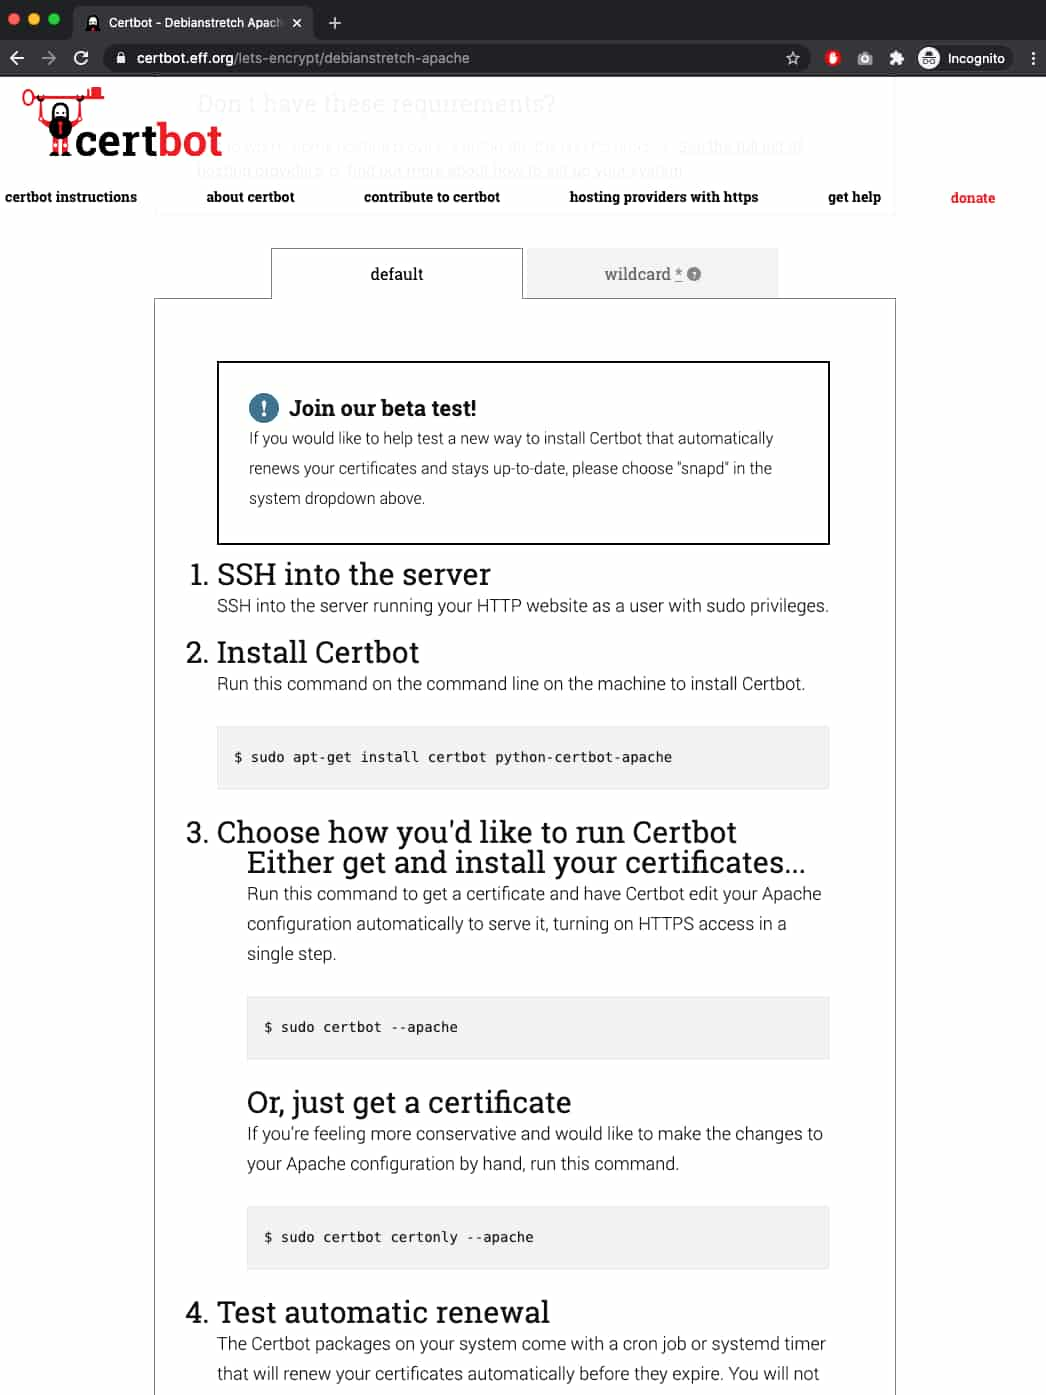
Next, go to your SSH terminal and copy install certbot command from instruction.
Then press Enter to execute the command.
sudo apt-get install certbot python-certbot-apacheEnter Y when asked and hit the ENTER key to proceed.
4. Generate SSL Certificates
The Next Step in the instruction is to Generate an SSL Certificate.
Type, sudo certbot –apache to generate SSL Certificate then press ENTER.
sudo certbot --apache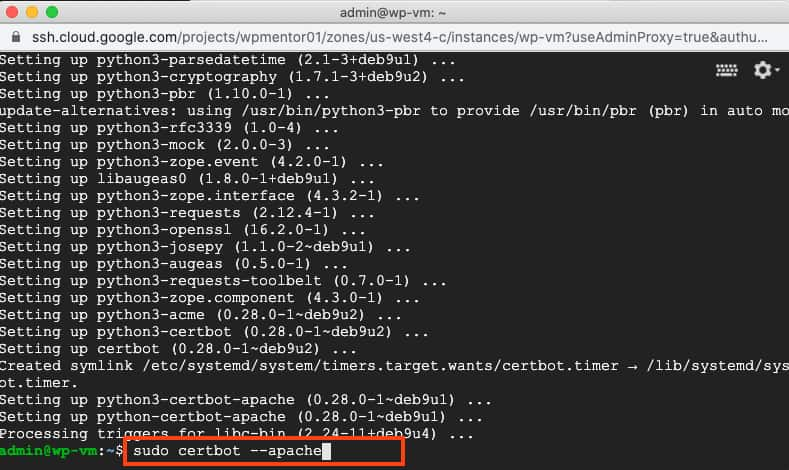
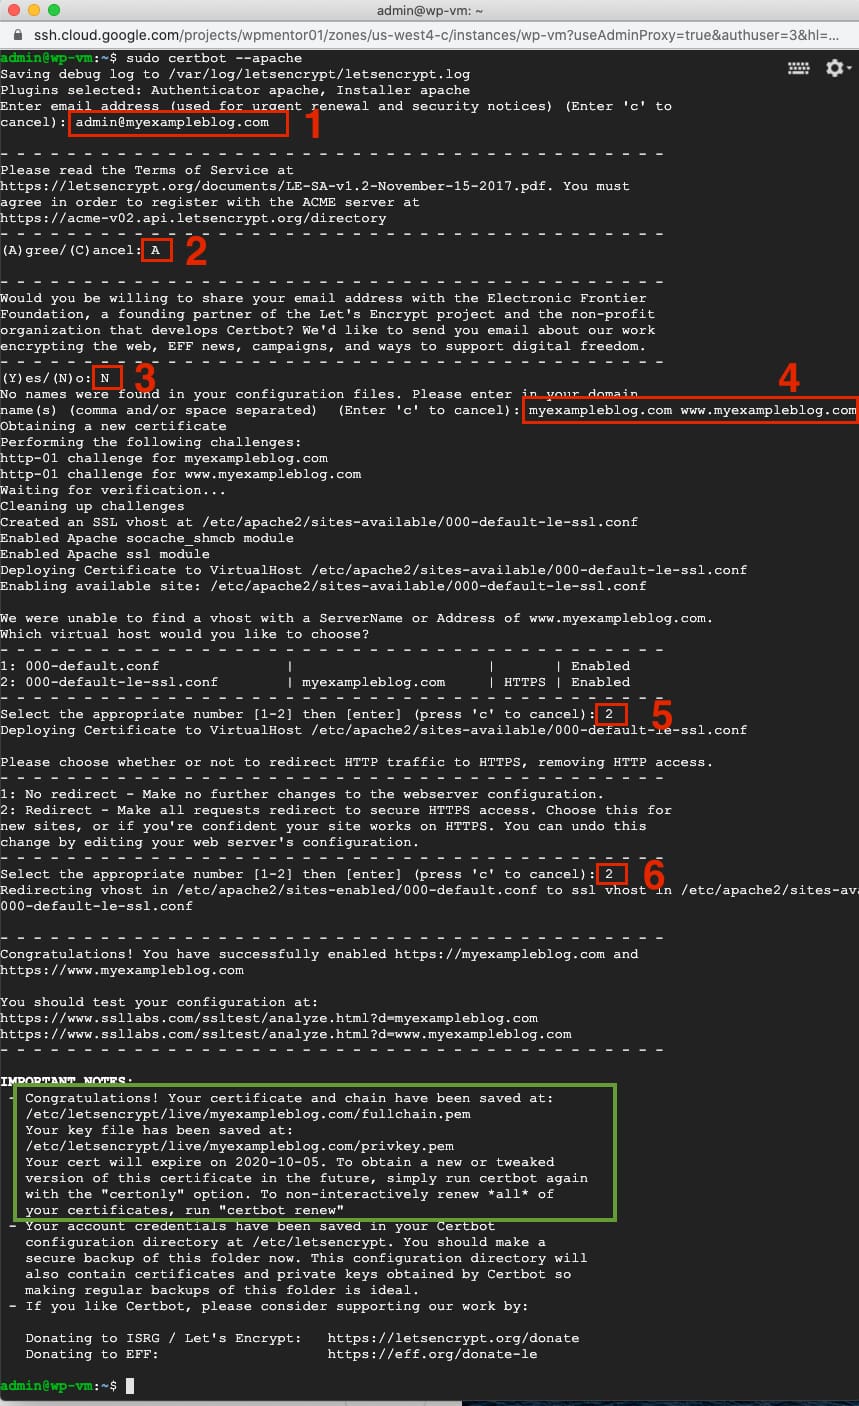
After you press the ENTER there will be series of Question will be prompted answer the question as shown in below image.
- Enter an email address where security and renewal notices will be sent.
- Please agree on terms and conditions with typing A and then enter.
- If you don’t want to share your email address, then type N.
- enter the hostname of your domain in my case it’s myexampleblog.com, and www.myexampleblog.com
- enter the hostname that certbot finds for me. It was myexampleblog.com.
- If you want to redirect all traffic to HTTPS then please enter 2.
5. Restart Apache Server
Restart the Apache Server after successful installation of certificate with following command.
sudo service apache2 restart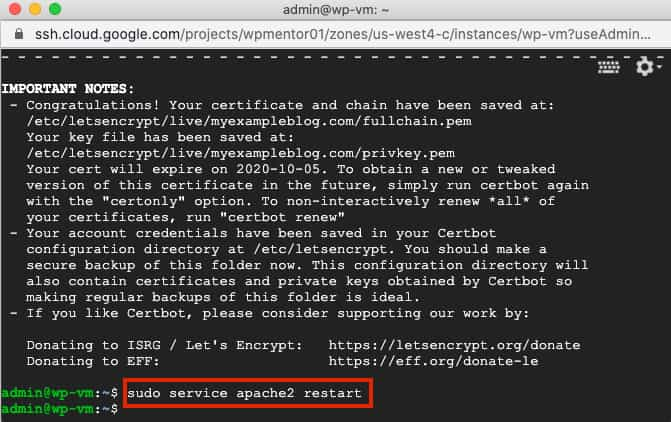
6. Update WordPress URLs
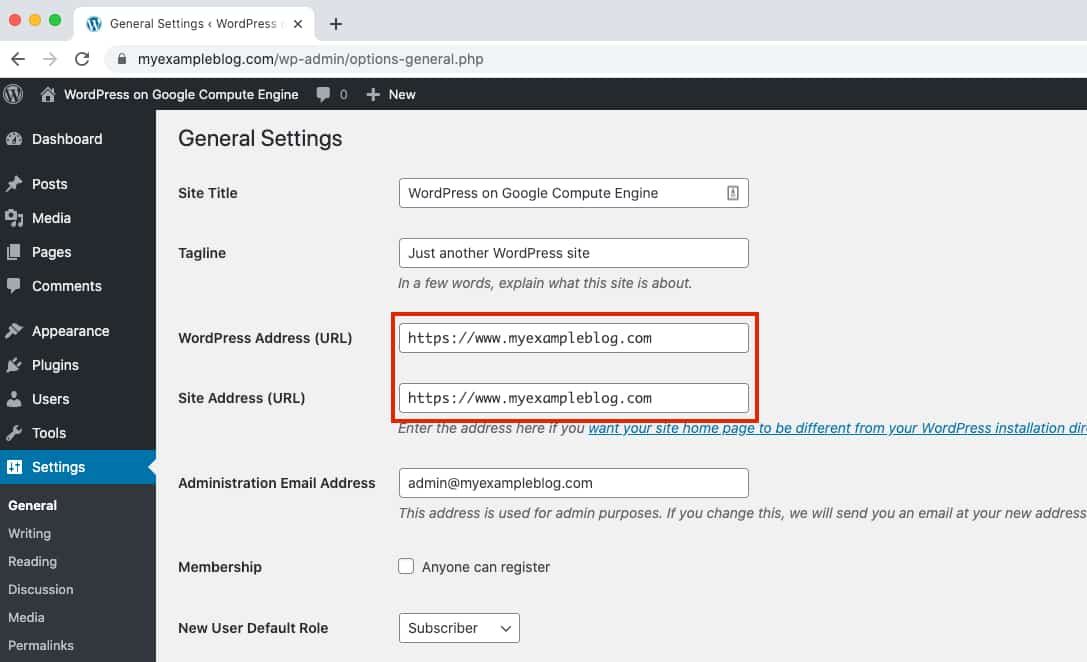
Now, go to your WordPress dashboard and Settings => General and change the URL to https.
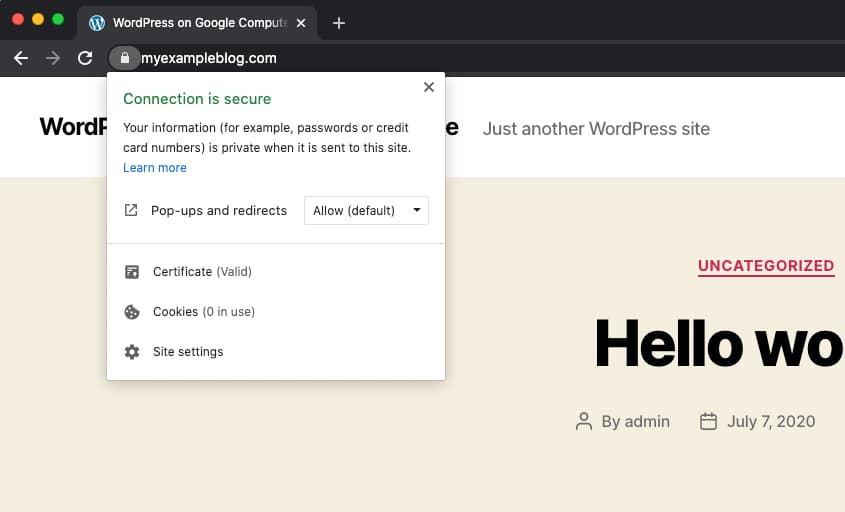
Now, your site has SSL certificate installed, you can verify in the browser.
That’s it
The Certbot packages on your system come with a cron job or systemd timer that will renew your certificates automatically before they expire. So, you don’t need to worry about the broken SSL certificate.
you can also check at SSL Checker tool or https://www.ssllabs.com/ssltest/ to verify your SSL certificate.
If you have any questions or comments, please don’t hesitate to post below.
Thanks.

I want to know more about this Setup Free SSL Certificate for WordPress on Google Cloud.
please follow the tutorial and if you find any difficulties let me know here in the comment section.
Thanks, a million. Works perfectly
I’m glad it helped
Thanks a lot… Worked perfectly….
I’m glad it helped you to install an SSL certificate for your google cloud WordPress. server.