Once you deploy your WordPress instance in Google Cloud, the first step will be to assign a static IP address to the WordPress instance. If you haven’t followed along we have installed WordPress on Google Cloud in the first part of this tutorial.
Why this is important?
Because once you reset or restart your compute engine of your WordPress instance, your public IP address will change if you haven’t reserved the static IP address to your resources.
We assume that before starting this tutorial, you already deployed WordPress to Google compute engine. If not, follow this tutorial to deploy WordPress on Google Cloud.
You have two options to assign a static IP address.
- Assign Existing IP Address
- Reserve New IP Address.
1. Assign Existing IP address
Once you have created your compute engine resource. It will have the public IP address you can keep that IP address as static IP.
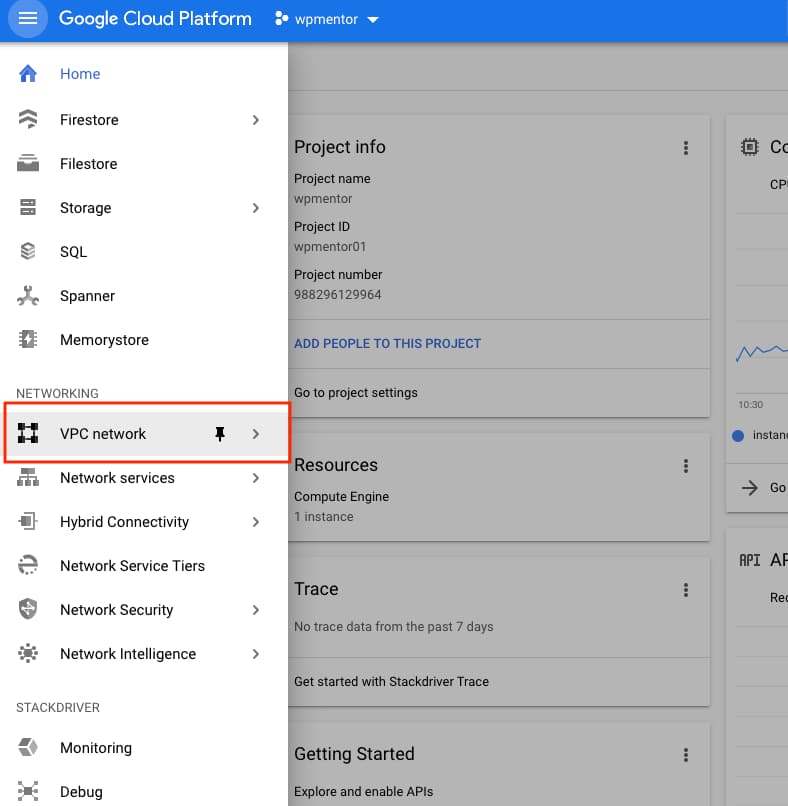
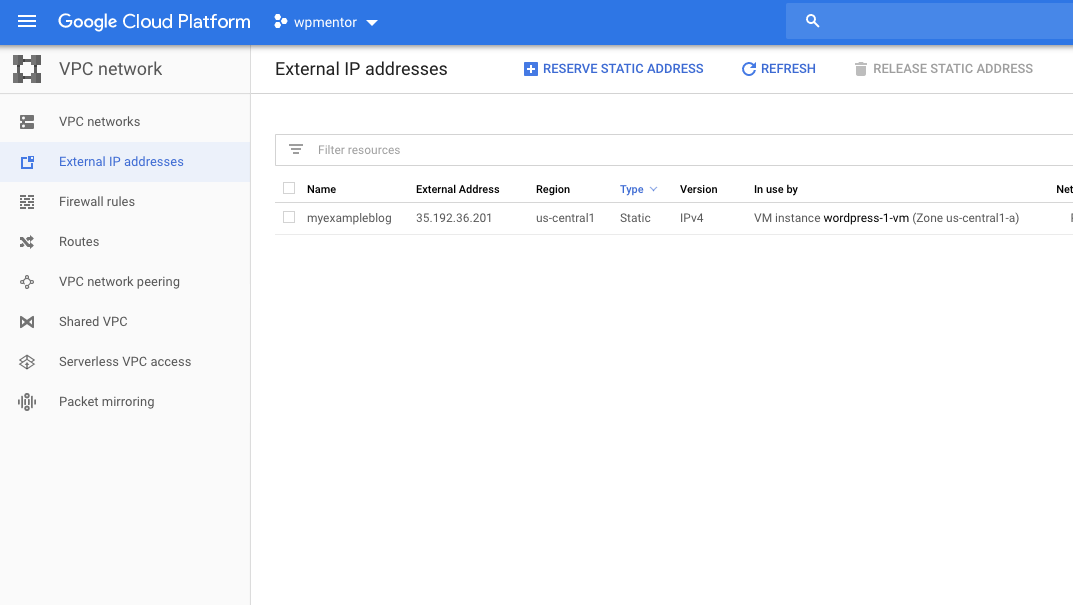
The first step is to go to Google Cloud and Click on Networking => VPC Network. Here is the direct link to go to external IP address.
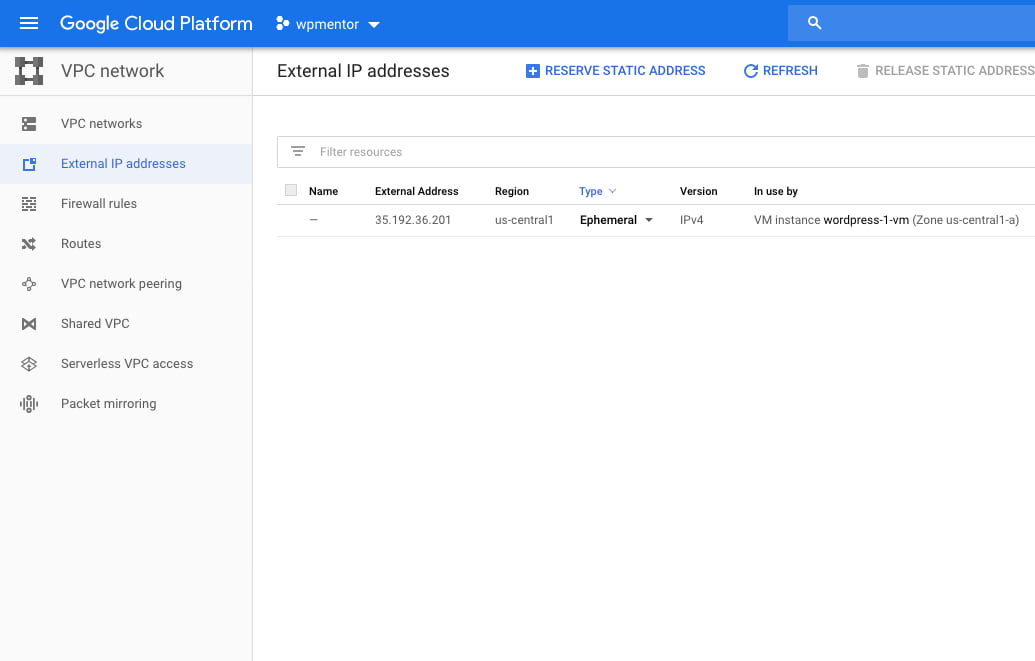
Now you will see your created WordPress Compute Engine resources here.
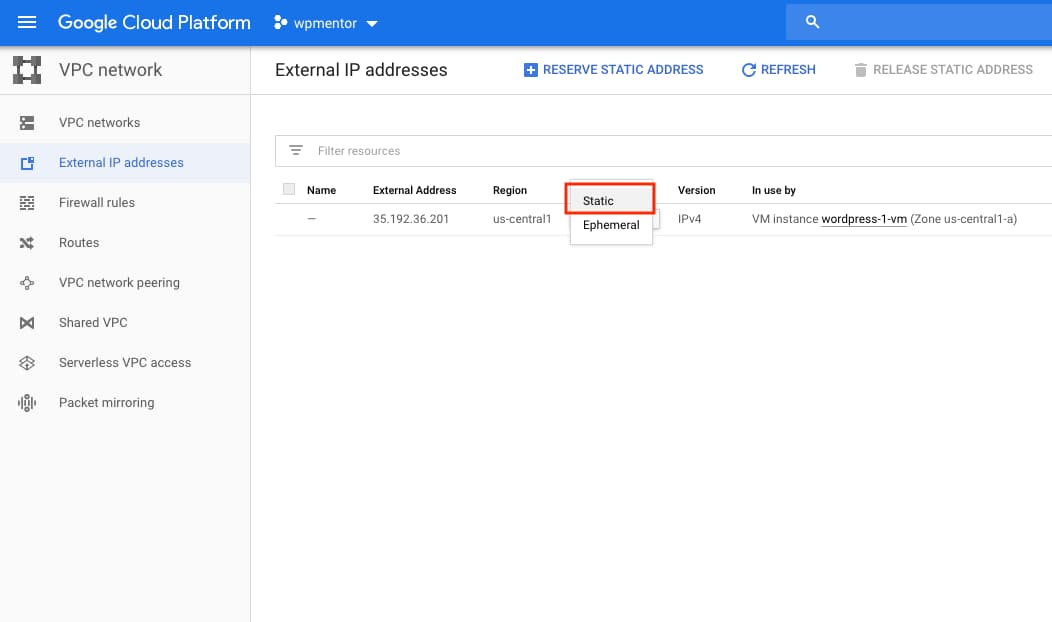
Now change the IP address type from Ephemeral to Static. ( this will change the IP address to static IP address)
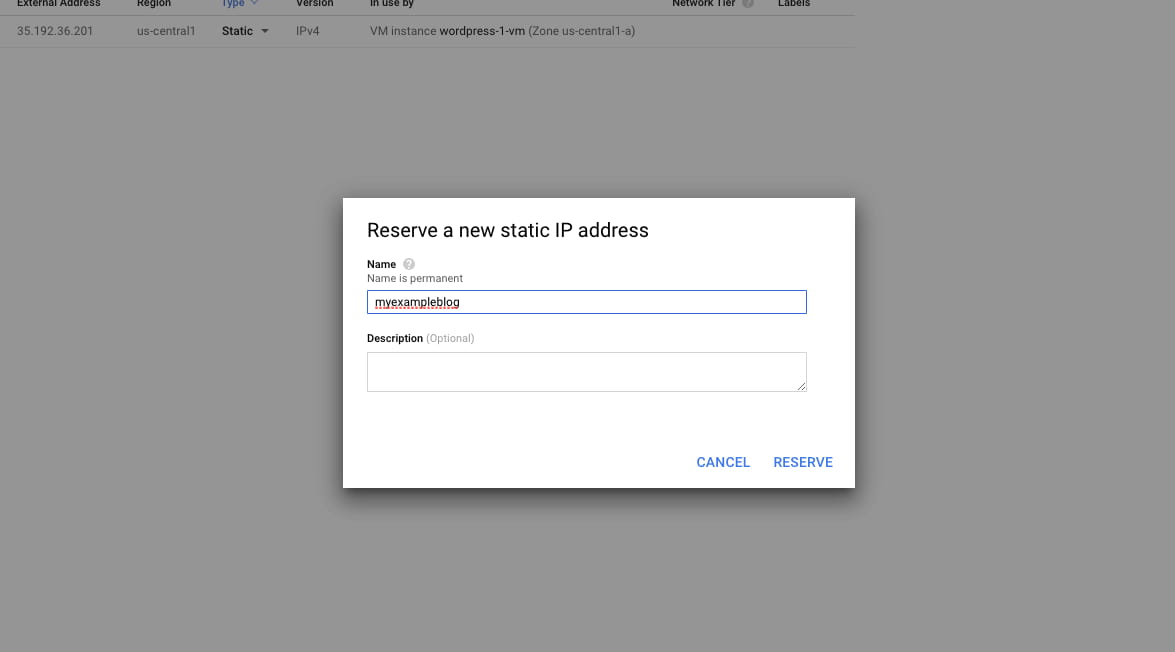
Give the name to your static IP to distinguish between multiple static IP addresses.
Now your resources have an IP address assigned. anytime you need IP address use this IP address to assign to the domain.
2. Reserve New IP Address
If you don’t want to use existing public IP as static IP then you can create new Static IP.
Go to VPC network => External IP addresses and click on Reserve a static address.
Make sure you selected the region where your WordPress compute engine is running. Otherwise, it will not show up in the list.
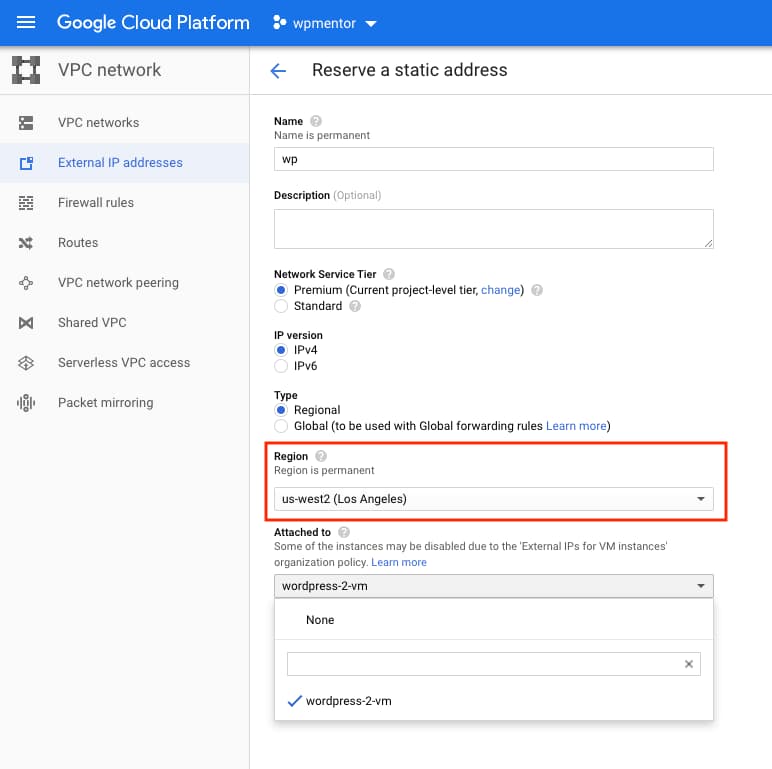
That’s all your static IP is reserved.
Static IP assignment is important when you’re deploying WordPress with Cloud Provider. Most of the cloud provider has free Static IP address if that static IP address is assigned to an instance or virtual machine.
Now you have WordPress installed in Compute Engine and assigned the IP address.
Next thing is to,
- Transfer Domain Names to Google Cloud. ( if you don’t want to transfer a domain and use third party DNS like Cloudflare or GoDaddy. use this Tutorial to configure domain name in Cloudflare.
- Configure Free SSL Certificate.
If you have any questions about this tutorial please post them as comments below.
